Inexpensive French Intensive Gardening

Inexpensive French intensive container gardening lets you grow some of your own food in a small space. And it requires little labor and cost.
Being wheelchair bound, I was no longer able to garden at first. That destroyed my financial health, because in comparison to the produce most grocery stores offer, harvesting your home-grown veggies is both tastier and considerably less expensive.
After some trial and error, I developed a way to successfully container garden on a sunny 14×16 foot part of my deck using French Intensive Gardening.
You Can Grow a Lot in a Little Space
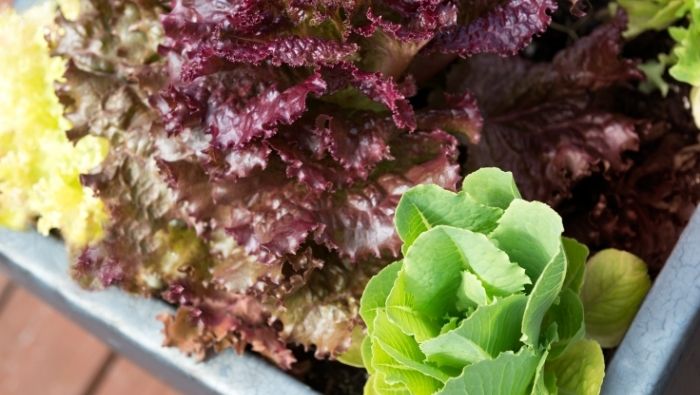
The first year I harvested 450 patio tomatoes (large tomatoes suffice to can 20 quarts of sauce), daily lettuce three months in the spring and in the fall, 20 quarts of green and scarlet runner beans for eating and pickling, enough green and red peppers to eat all spring and summer and still freeze for the winter, 15 quarts of snap peas, and chives, dill and basil to flavor whatever I was cooking. And I still had room left!
I eventually added broccoli, Brussels sprouts, short carrots, and collards to my early plantings. I’m also added miniature blueberry and raspberry bushes for a sweet touch. I spent a little over $120 in seeds and potting mix and harvested well over $550 in produce.
French Intensive Gardening Requires Little Labor, Too
The biggest advantage to this form of gardening is that it is easily tended. Even if you have a disability, you can continue to enjoy the benefits of nature by engaging in a container-based form of French Intensive Gardening.
Sign Up for Savings
Subscribe to get money-saving content by email that can help you stretch your dollars further.
Twice each week, you'll receive articles and tips that can help you free up and keep more of your hard-earned money, even on the tightest of budgets.
We respect your privacy. Unsubscribe at any time.
You’ll Need To Invest in Containers and Seeds
Your first year will be the most expensive, because you will be accumulating your containers.
If you purchase heritage seeds, which allow you to save the seed from the veggies you grow, you only need to purchase them once. If not, hybrid seed needs to be ordered each season.
Do not try to use traditional round containers that one would put trees or indoor plants in. They’re not large or deep enough for the roots of the plants to spread out. Instead, look for the big, heavy, and dark-colored plastic tote boxes you normally store camping supplies in. You want them to be approximately two to three feet long and no more than two feet wide. Avoid clear, thin plastic, which becomes brittle and breaks from the sun by the end of first season.
I look for these totes on sale at the big-box stores and/or thrift shops.
Setting Up Your Containers
Once home, you can put the lids aside. Drill from the inside a dozen holes along each side of the container for drainage, using a 1/4-inch bit. (Bottom holes get plugged.) Stagger them up and down one to three inches from the bottom. A straight line weakens the box. When the tote is filled, water should drip out from these. Too few holes leave plants with wet feet, which they hate.
Place your containers on your deck, patio, or balcony, so they get six hours of sun. Each time you plant, fill the tote with new, rich potting soil, not planter’s mix. This will be your biggest expense each season. I prefer Miracle-Gro®.
You can plant a second time by mixing new manure in well. Fill to within four inches from the top, leaving room to water. In the case of vining plants, such as snap peas or pole beans, also insert some sort of lattice at the back to hold the vines. I use old display grids I bought from a retail store supplier because they are strong. Ladder or fencing pieces work as well.
Planting and Caring for Your Seeds
Once you have your containers placed and filled, water them really well and let the potting soil settle. Then it’s just a matter of planting either your seeds or transplants. You can start seeds inside under lights, in a bright window, or often buy them from nurseries. (See Frugal Seed Starters for Cutting Gardening Costs.)
Certain plants are particular. Snap peas and green beans hate being transplanted. Wait to plant seeds directly in totes when the weather is above 55 degrees Fahrenheit every day. Tomatoes need a ton of calcium and magnesium, so when preparing their boxes, mix throughout the potting soil a lot of crushed-up egg shells and Epsom salts. Peppers and tomatoes need to have water every day! Lettuce, broccoli, Brussels sprouts, and collards hate heat. Plant them in a shadier area and early in the spring or later in the fall.
To extend the season for your French intensive garden, as it gets colder, you can tent individual containers with clear painter’s tarps for mini-greenhouses and/or place windows over the top with straw bales around the totes for cold frames.
Related: Creating a Labor-Saving Garden
Because you are giving the plants such rich soil, you don’t need to fertilize, except for adding iron or fish emulsion during the season to adjust pH or provide missing trace minerals. If needed, water them daily. Above-ground boxes dry out faster. Once you’ve tried this method of gardening, you may never go back to planting in-ground again.
Reviewed March 2024
Popular Articles
- 7 Habits of Highly Frugal People
- 5 Simple Budget Cuts That Can Save $200 a Month
- How to Track Down Unclaimed Funds Owed You
- 32 Ways to Save Money on Your Utility Bills
- Do You Need Credit Life Insurance When Buying a New Car?
- How to Maximize Profits When Selling Online
- Staying Motivated to Continue Digging Yourself Out of Debt
On After50Finances.com
- 9 Things You Need to Do Before You Retire
- You Didn’t Save Enough for Retirement and You’re 55+
- When Empty Nesters Reorganize and Declutter Their Home
- Reinventing Your Career in Your 50s or 60s
- What Mature Homeowners Should Know about Reverse Mortgages
- 2 Reasons to Collect Social Security Benefits As Soon As Possible


