Learn Pressure Cooker Canning Basics To Cut Food Costs

Reduce your grocery bill by learning how to preserve your own food. Get started with these pressure cooker canning basics.
A boiling water bath is simple to use for canning some things, but pressure cooker canning is necessary for many vegetables, and all meats, poultry and seafood.
As with boiling water bath canning, the food is packed into jars and closed with rings and lids, then put into canner. The difference is that a pressure canner uses two to three inches of water, just enough to create a pressure when closed and heated.
After the canner is closed, the pressure must be brought to a certain level depending on where you live (differing altitudes have different air pressures). Always follow a book or recipe closely when it tells you how long a food must be held at a certain pressure.
Clostridium botulinum is a dangerous microorganism that will produce spores in an airless condition and low acid foods, so they must be destroyed completely. Botulism, which can cause death, is the result of improperly canned food.
Pressure canning is similar to boiling water bath canning in some ways. The reason for canning some foods under pressure is to raise the temperature high enough to make food safe that isn’t acid, or that has qualities (like meat) that make it spoil easily.
Sign Up for Savings
Subscribe to get money-saving content by email that can help you stretch your dollars further.
Twice each week, you'll receive articles and tips that can help you free up and keep more of your hard-earned money, even on the tightest of budgets.
We respect your privacy. Unsubscribe at any time.
Pressure Cooker Canning Equipment
You’ll need to gather your equipment first.
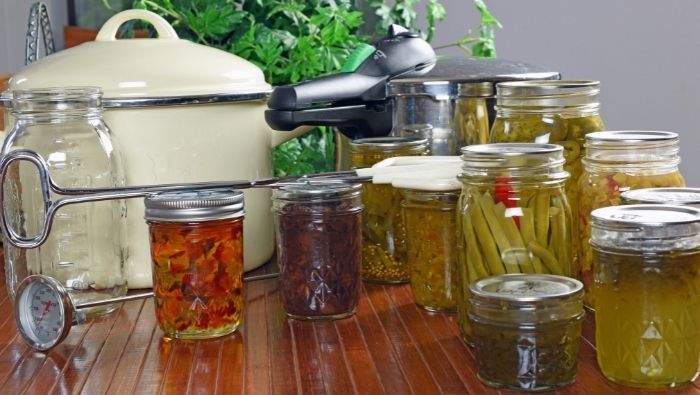
For pressure canning, you’ll need a canner with a dial or gauge (it should be checked each year before starting – call your local extension service – they may do it for free), rack, jar lifter, damp cloth, timer or clock, and an area in which to cool the jars.
Recommended Pressure Canning Supplies for Beginners
- The Complete Guide to Pressure Canning: Everything You Need to Know to Can Meats, Vegetables, Meals in a Jar, and More
- Canning Supplies/Canning Set for Beginners
- Pressure Cooker Canner Racks
- Presto 16-Quart Pressure Cooker - Canner and Cooker
- Presto 23-Quart Pressure Cooker - Canner and Cooker
- T-fal 22-Quart Pressure Cooker and Canner
Pressure Cooker Canning How-To
Prepare the food, then fill the canner with two to three inches of water, set the rack in it and put it on to heat. Add food to jars according to your recipe and directions, and put each jar in the canner until it’s full. Jars should not touch each other.
Fasten the lid securely and allow the canner to build pressure and vent steam for 10 minutes, then close the vent and wait until the pressure dial shows the pressure you need. If you’re using a gauge, wait until it “jiggles.” Turn down the heat slightly to keep the proper pressure and start counting time. If, for some reason, the pressure drops below what your directions call for, raise it again and start timing all over again.
When the time is up, remove the canner from the heat and allow it to lose pressure naturally. Don’t try to cool it by running cold water over it. When it cools, carefully open the valve and allow any excess steam to escape, then open the lid, being sure to slant it away from you.
Take out the jars and put them on a cooling rack or towels to cool and leave at least an inch for air circulation between them. Don’t move the jars for 24 hours, then check the seals, wipe the jars, label and date them and put them away in a cool, dark place.
Recommended Pressure Canning Supplies for Beginners
- The Complete Guide to Pressure Canning: Everything You Need to Know to Can Meats, Vegetables, Meals in a Jar, and More
- Canning Supplies/Canning Set for Beginners
- Pressure Cooker Canner Racks
- Presto 16-Quart Pressure Cooker - Canner and Cooker
- Presto 23-Quart Pressure Cooker - Canner and Cooker
- T-fal 22-Quart Pressure Cooker and Canner
Reviewed October 2022
Wouldn't you like to be a Stretcher too?
Subscribe to get our money-saving content twice per week by email and start living better for less.
We respect your privacy. Unsubscribe at any time.
Popular Articles
- 7 Habits of Highly Frugal People
- 5 Simple Budget Cuts That Can Save $200 a Month
- How to Track Down Unclaimed Funds Owed You
- 32 Ways to Save Money on Your Utility Bills
- Do You Need Credit Life Insurance When Buying a New Car?
- How to Maximize Profits When Selling Online
- Staying Motivated to Continue Digging Yourself Out of Debt
On After50Finances.com
- 9 Things You Need to Do Before You Retire
- You Didn’t Save Enough for Retirement and You’re 55+
- When Empty Nesters Reorganize and Declutter Their Home
- Reinventing Your Career in Your 50s or 60s
- What Mature Homeowners Should Know about Reverse Mortgages
- 2 Reasons to Collect Social Security Benefits As Soon As Possible


